How to set spring pre-loadIt is extremely important to make sure the coil-over are properly set to avoid future problems that may occur when the coil-over are not properly set up and adjusted accordingly. Preload or in other words spring tension is amongst the most important thing when it comes to your coil-overs. You will have to make adjustments to dial it in and get it set up correctly to get the most from your vehicle and your new suspension setup. The first part of this question is easy. Many coil-over units come with a threaded strut body. The lower spring perch is threaded onto the body. This perch is turned to raise or lower the ride height of the vehicle. Preload is when the spring is compressed between its upper and lower perches on the strut body before the assembly is placed in the car. The more important and contentious part of the question concerns the effect preload has on the properties of the spring. The answer to this question is contentious because the principles behind it are, at least for many people, counter-intuitive the first time around. Many people intuitively associate spring rate with the amount of resistance a spring provides when it is deformed (stretched or compressed). The resistance provided by a spring against deformation is known as restoring force, and is variable depending on how much the spring is deformed. The spring rate is the amount of force (weight) needed to compress a spring a given distance. |
|
 |
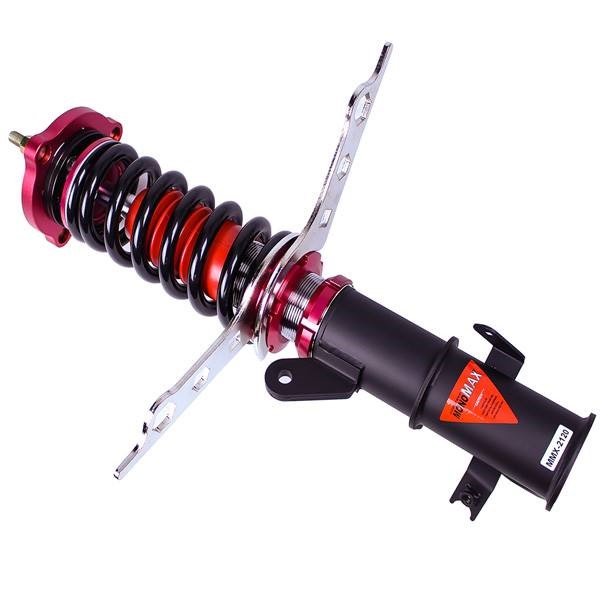
In this photo, you will see there is a gap between the spring and the two lower locking spring perches. NOTE: Do not adjust height with the two locking perches-- available shock travel will be decreased and can potentially damage the shock. Setting the ride height with the two locking perches will void the coil-over warranty. You do not want to have a gap between the spring and the upper and/or lower spring perches. Leaving a gap between the spring and the perches will sacrifice usable shock travel and increase the potential for bottoming out the shock against the bump stop. For example, if there is 1" of gap between the spring and the perch, you are losing 1 inch of valuable shock travel. Our coil-overs are NOT factory preloaded |
|
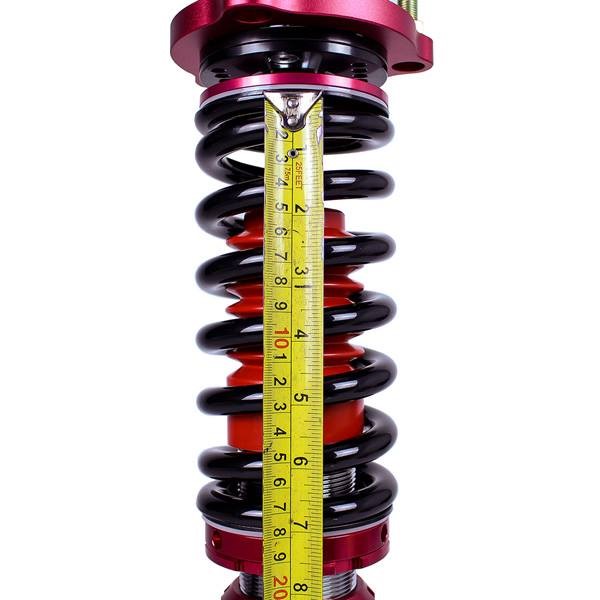
There are several ways to set the spring pre-load. A technical and mathematical way of setting the spring pre-load would be to first measure the free-length of the spring when the spring is unloaded. You do not want to measure the length of the spring if the spring is compressed in any way as it would give you an inaccurate free-length measurement. If you notice now in the above photo, the measurement of the spring is still approximately the same length as the free-length of the spring. The idea behind this is that the spring should not be compressed (e.g. "pre-loaded") by the perches. When installed on the vehicle, the spring should not have any vertical movement-- it should be able to move up and down along the shock body. Also, to check for the tension of the spring perches against the spring, it should not take too much force to twist the spring in place, but it should not be too loose that it is easy to spin the spring within the perches. Once you have made sure that there is zero pre-load on the spring, you can proceed to lock the two lower locking spring perches together to hold the spring in place. For the most part, this is rather intuitive, but without fully understanding the concept "righty-tightly, lefty-loosely," it can become confusing especially when there are multiple ways of positioning the spanner wrenches against the perches to adjust them. |
|
|
|
In this photo, the spanner wrench to the left of the coil-over body is the larger spanner wrench and is affixed to the teeth of the upper/larger spring perch. The spanner wrench to the right of the coil-over body is the smaller spanner wrench, affixed to the teeth of the lower/smaller spring perch. When looking "up" at the two lower locking spring perches and coil-over assembly, you are trying to rotate the larger spring perch "counter-clockwise" and rotate the smaller spring perch in a "clockwise" direction-- again, these references are made when looking "UP" at the coil-over at an angle. If you do this correctly, the perches will thread onto the shock body and lock against each other. If you positioned the spanner wrenches incorrectly and rotated the perches incorrectly, the locking perches will separate from each other. If the perches separate simply do the opposite of what you did. Yes, it is THAT simple! Congratulations on correctly setting the spring pre-load! Now proceed to set the spring pre-load on all four corners. After pre-load is set, you can set the length of the coil-over assembly to set the ride height. |
 |
|
CUSTOMER SUPPORT: 1-626-442-3988 M-F 10AM-6PM PT
Information
Company
- Site Map
- Search Terms
- Advanced Search
- Orders and Returns
- Contact Us
- faq
- My Account
- Orders and Returns
4466 Baldwin Ave.
El Monte, CA 91731
U.S.A.
TEL: 626-442-3988
Hours: 10am-6pm Pacific Time
Help Us to Keep OpenMage Healthy - Report All Bugs (ver. 20.0.20)
© 2011-2023 Godspeed Project Store. All Rights Reserved.All manufacturers and car model names used in this website are for identification purposes only.
All copyrights belong to their respective owners.
No affiliation, sponsorship. approval, or connection with these organizations is intended.