How to install coil-oversDISCLAIMER: ALL installation information and recommendations made in these articles are for our customers to use at their own risk. Godspeed Project does not make any representations or warranties as to the completeness or accuracy of the installation instruction in this article. Detailed Installation procedures vary heavily from vehicle to vehicle, and therefore this installation article should be viewed as a GENERAL installation instruction. Professional installation is always highly recommended. Professional Installation is highly recommended. Please read through this installation instruction walk-through before attempting to start with the installation process. If there is a step within the installation instructions that you do not feel comfortable with performing on your own vehicle, please do not continue and take the car to an ASE Certified mechanic to ensure proper installation. Improper installation may potentially damage the product and will void the product from warranty eligibility. Feel free to contact us with any questions or concerns. Godspeed Project related products, are sold for off-road use only. All performance modifications and installations are at the customers own risk. We hold no responsibility either implied or otherwise for mechanical or other failure when using any aftermarket performance products. Items sold for off-road use only are illegal in any states and provinces and are intended for racing vehicles which may never be used on a public road. By purchasing any aftermarket performance product, the customer takes full responsibility for any use, and/or misuse of the product and agrees that Godspeed Project, Fatboy Garage or www.godspeedproject.com holds no responsibility for any consequences, legal, or other, of such use and/or misuse. Any physical damage to the product will void the warranty automatically. Please keep the original purchase invoice within the warranty period—the lack of a proof of invoice automatically voids the product warranty. ALL invoices must be from an authorized Godspeed seller. Prior to returning a defective item, please contact our customer service by phone or email—we will NOT accept returns without approval from the warranty department. |
|
   |
Step by Step General Instructions(Not Car Specific, Some Instructions Are Not Apply To Certain Chassis) MAKE SURE SPRING IS PRELOADED! SEE INSTRUCTIONS HERE. 1) Using a car jack or an automotive lift, safely raise the vehicle to desired height paying special attention to the safety precautions set forth by the equipment manufacturer. Stabilize and support the car using any necessary equipment such as jack stands of sufficient load rating—typically, a 2-ton jack stand should be sufficient for most applications. The following photo gives a general idea where the jack points usually are on vehicles. Make sure you support the car at the specified jacking points on the chassis, indicated in the vehicle owner’s instruction manual. 2) Remove the wheels of the vehicle and place them aside to expose the wheel well and suspension system. As a recommended safety precaution, it is a good idea to place the wheels underneath the vehicle, along the side skirt area in case of jack stand failure. 3) Remove any brake lines or hardware that is attached to the OEM shock/strut assembly and save all the parts that you have removed. You will be re-using some OEM hardware with the damper kit to re-mount the brake lines, ABS lines or any other lines mounted to the shock assembly. 4) For the front suspension, remove the nuts and/or bolts that mount the lower bracket of the shock to the lower control arm. It is also recommended to disconnect the sway bar end link to disconnect one end of the suspension from the other to avoid any pre-load. Loosen the nuts from the top of the engine bay to loosen the shock assembly from the vehicle. Do not remove the nuts, just loosen them leaving a few threads of engagement or else the entire assembly will drop down from the vehicle. Make sure you have clearance to remove the shock assembly from the vehicle—watch for any brake/ABS lines that are affixed to the shock assembly. 5) Once it is clear, carefully remove the shock assembly from the vehicle trying to avoid contact with any of the suspension or brake components, especially the brake fluid line. Be sure to support the suspension assembly as you remove the hardware. 6) With the original suspension equipment off of the vehicle, now would be a good time to set the height of the new coil-overs. It would generally be a good place to start by setting the length of the coil-over assembly by approximating the desired shortened length compared to the OEM suspension components. 7) With the shock length already adjusted, it is time to mount them on the vehicle. Lift the damper kit through the underside of the chassis into position where the studs go through the OEM bolt-holes on the strut tower mount. Thread the nuts till you can see at least two threads past the top of the nut from the stud on the damper kit, but do not tighten. This will allow an ample amount of movement in the suspension system to help align the lower hardware. Be cautious when pulling down on the hub/knuckle assembly as it pull the axles apart and may potentially cause damage. Do not pull use too much force when doing this. Use caution and proceed carefully. 8) Using the OEM hardware, replace the lower mounting hardware into the lower bracket and hand-tighten them. Now is a good time to mount all of the loose brake lines and/or ABS lines that were previously affixed to the OEM shock body. Re-use the OEM hardware to do so. In some applications, the sway bar end links mount directly onto the lower bracket of the coil-over assembly. Now would be a good time to do so. 9) Torque the top nuts on the top of the damper assembly to OEM torque specifications and then toque the lower hardware at the bottom of the damper to OEM torque specifications as well. 10) For the rear suspension, remove the single nut and bolt that is supporting the lower end of the shock/strut assembly, placing all hardware aside for future use. With the interior of the car removed to expose the upper suspension hardware, carefully remove the two nuts holding up the shock/strut assembly. BE CAREFUL, as now the rear suspension is no longer supported. Be sure to be clear of the OEM suspension or have it supported as to not let it fall and cause injury. 11) Remove the shock/strut assembly from the vehicle with the spring intact. You must now set the rear coil-over assembly length as instructed in Step (6). These approximate height adjustments are exactly that—approximate. You will need to re-adjust the suspension to your desired ride height once the coil-over install is complete. 12) Place the coil-over damper kit in the same location as the OEM suspension. Lift the damper kit through the underside of the chassis into position where the studs go through the OEM bolt-holes on the strut tower mount. Thread the nuts till you can see at least two threads past the top of the nut from the stud on the damper kit, but do not tighten. This will allow an ample amount of movement in the suspension system to help align the lower hardware. 13) Using the OEM hardware, replace the bolt, nut and any other hardware and finger tighten. It is important to tighten all suspension bolts with the suspension loaded by the vehicle. Without doing so, the bushings may bind, cause noises and worse yet, premature bushing wear. Torque the nuts on the top of the damper assembly to vehicle specifications and then toque the bolt at the bottom of the damper to vehicle specifications as well. If there were any brake lines or anything affixed to the rear coil-over assembly, mount them securely. 14) Lower the vehicle to the ground and take note of the ride height. It would be best to at least roll the car forward and back a few times to allow the suspension to settle. Driving the car up and down the street will create the same affect, allowing the suspension bolts to settle in place to give you the true ride height. Make all adjustments to the suspension system as you desire. 15) Adjust the camber to an equal setting on both the left and right side of the car, if the coil-over kit comes with camber plates. NOTE: Camber plates are only included in some Macpherson strut applications. Adjust the ride height to the same setting on both the left and right side of the car. Adjust the damper setting on the suspension to your desired rate. Adjust the setting by tightening the knob all the way till it stops, and then turning back the knob
|
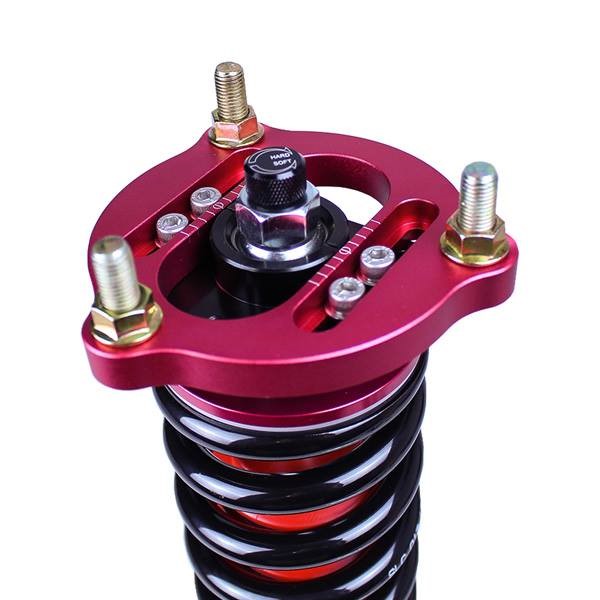 |
Dampening knob suggestions 16) Once the ride height is set, drive to the nearest alignment shop to make sure the alignment settings are set correctly. Any time you remove or even loosen a suspension component such as control arms and especially when replacing the suspension, the alignment will be thrown out of specification. For alignment recommendations on your particular vehicle and driving style, please feel free to contact our TECH department to discuss your options. 17) OPTIONAL: An optional step that is not absolutely necessary but is highly recommended is having the vehicle corner balanced prior to getting the vehicle aligned. It is not an absolute necessity for an average daily driven vehicle, but is necessary to extract every bit of performance from your new suspension. |
CUSTOMER SUPPORT: 1-626-442-3988 M-F 10AM-6PM PT
Information
Company
- Site Map
- Search Terms
- Advanced Search
- Orders and Returns
- Contact Us
- faq
- My Account
- Orders and Returns
4466 Baldwin Ave.
El Monte, CA 91731
U.S.A.
TEL: 626-442-3988
Hours: 10am-6pm Pacific Time
Help Us to Keep OpenMage Healthy - Report All Bugs (ver. 20.0.20)
© 2011-2023 Godspeed Project Store. All Rights Reserved.All manufacturers and car model names used in this website are for identification purposes only.
All copyrights belong to their respective owners.
No affiliation, sponsorship. approval, or connection with these organizations is intended.